Overview
Manage transport rental options shown to guests. Follow the steps below to complete this task.
📂 Main Menu - Leisure
Beginner
⏱ 2 min
📋 3 steps
Navigate to Transport Rent
Open the page from the sidebar
In the left sidebar, expand Leisure under Main Menu and click Transport Rent. This page manages transport rental options — cars, motorbikes, and shuttle services, shown to guests in the Leisure section of the TV.
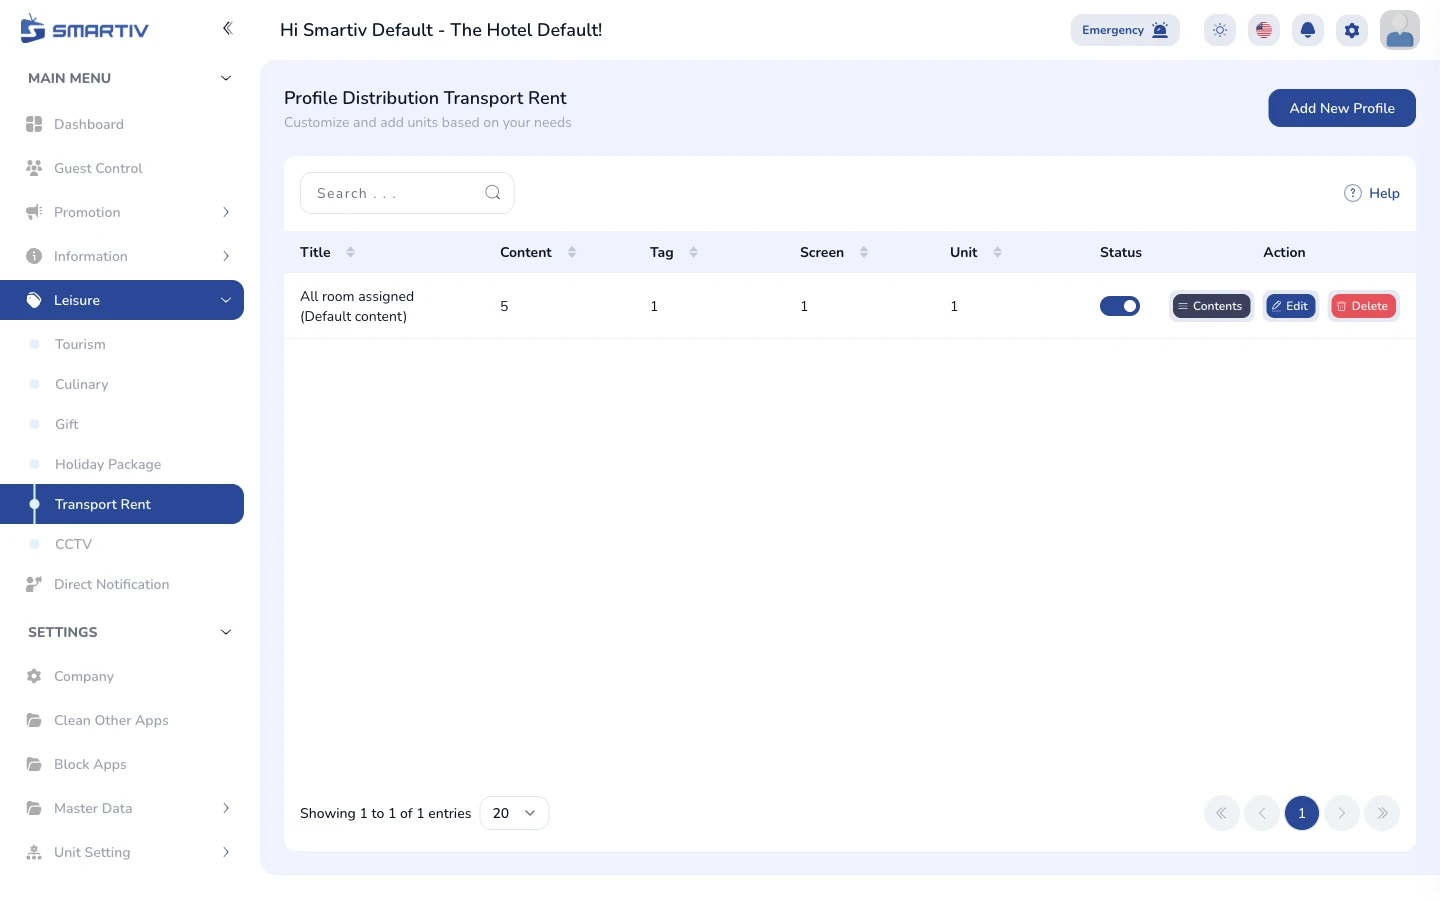
The Transport Rent page showing the list of existing transport entrys.
NoteDirect URL:
/main-menu/leisure/transport-rentUnderstand the List
Learn what each entry shows
Each row shows a transport entry with its name, preview, and status. The Action column contains the Edit and Delete buttons for each entry.
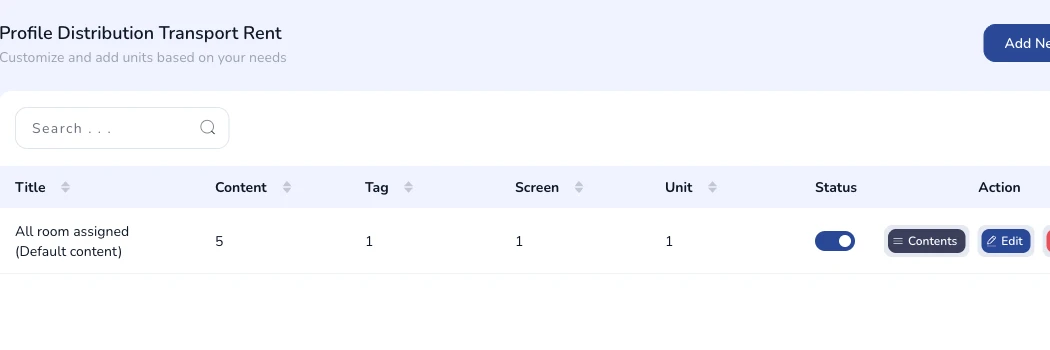
The Transport Rent list with its columns and action buttons.
TipUse the Search bar at the top of the table to quickly find an entry by name.
Click "Add New"
Open the creation form
Click the Add New button in the top-right corner of the page. A modal dialog appears with the form fields to fill in. Enter the vehicle or service name, description, rental terms, and upload a photo. Click Save to store the new transport entry.

The "Add New" button in the top-right corner.
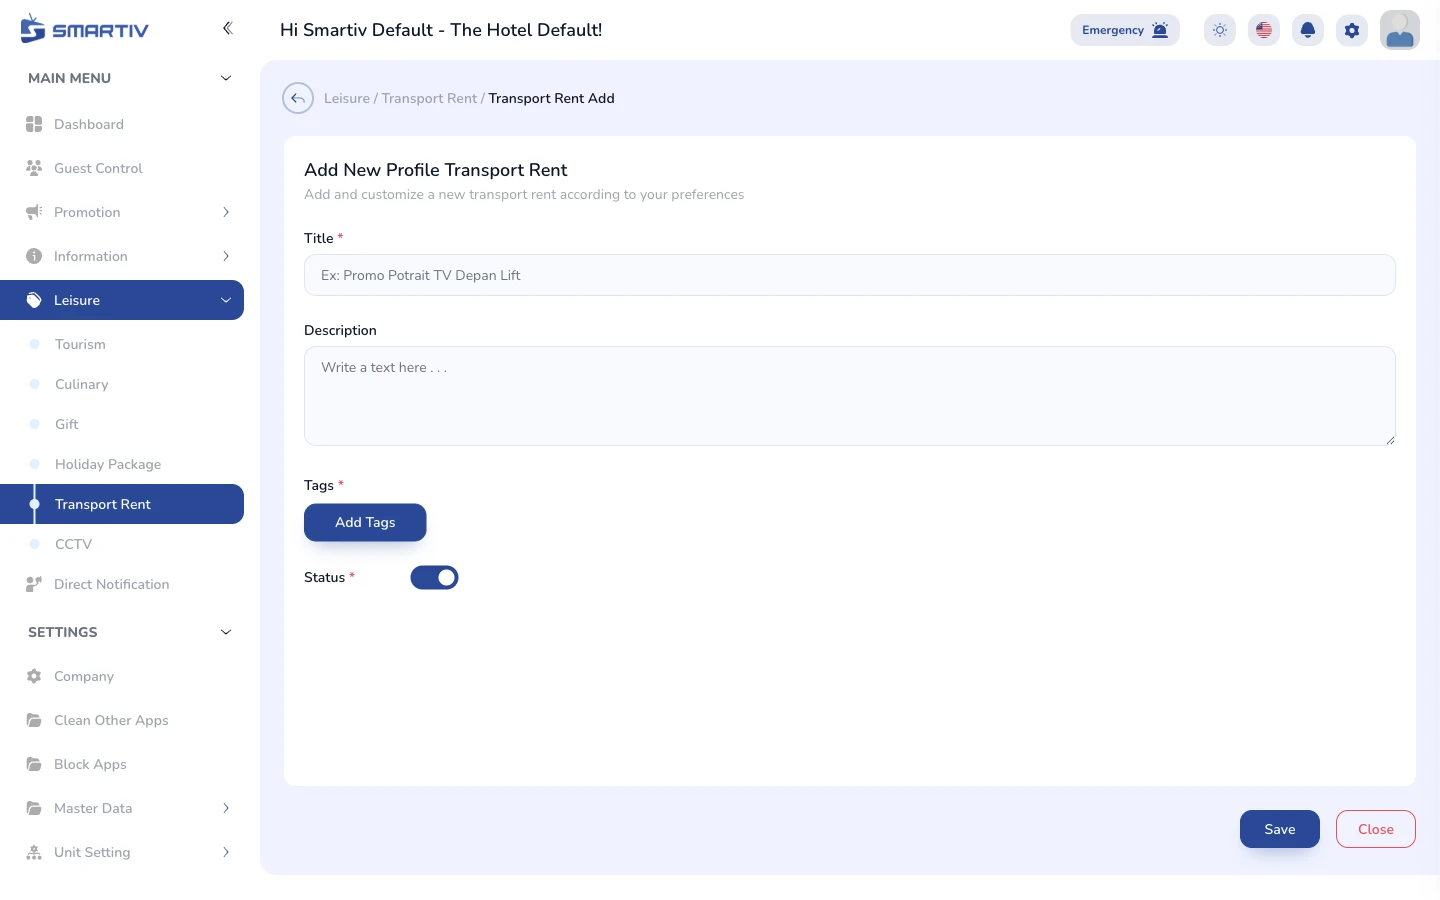
The empty creation form modal.